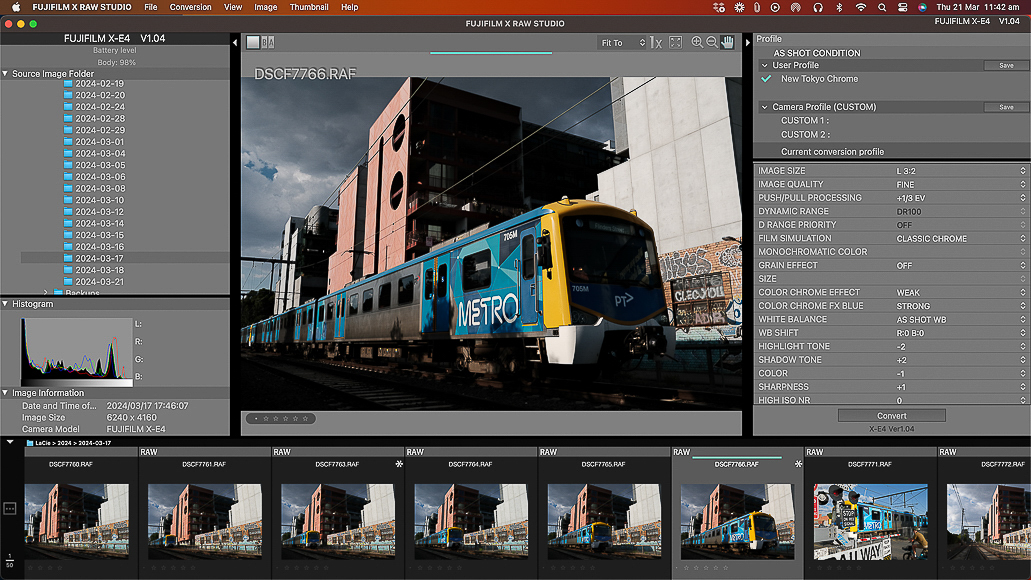
This guide will help you make the most of Fuji X RAW Studio – the free software developed by Fujifilm.
It’s designed to support all Fujifilm X Series and GFX Series photographers in editing and converting RAW image files to JPEG format.
Fuji X RAW utilises the in-camera Fujifilm X Processor to power the RAW image conversion process.
The software is available for Windows and Mac laptops or desktops. Unfortunately, it’s not available for tablets or mobile devices.
While readily available and easy to use, it’s often overlooked as an image editing and workflow solution.
Let’s closely examine what makes Fuji X RAW Studio tick.
What is Fuji X RAW Studio?
Fuji X RAW Studio is a companion app for Fujifilm X and GFX System photographers.
It’s a basic desktop application that enables Fujifilm photographers to edit and convert their RAW files into stunning JPEGs.
The application’s brains are within the Fujifilm X or GFX camera X-Processor.
As a result, the software mirrors the capabilities of the in-camera RAW file editing and conversion capabilities.
Fuji X RAW Studio enables RAW to JPEG file conversion and essential image editing tools.
- Free and accessible download on the Fujifilm website
- User interface mirrors the in-camera RAW to JPEG editing and conversion menu
- Provides minimal workflow management
- Effortless application of Fujifilm Film Simulations
- Allows creation of custom film simulation recipes for use in Fuji X RAW Studio
- Transfer your custom film simulations to the camera Q menu
- Connection and setup process is clunky until you get the hang of it
- No ability to transfer RAW files from a Fujifilm camera directly into X RAW Studio
- Editing options are limited and don’t allow for image cropping
- Fujifilm’s user manual has not been updated since launch
Who Is Fuji X RAW Studio For?
Many photographers are already well-versed in photography workflow and editing software such as Lightroom, Photoshop, and Capture One.
However, it’s important to note that big-ticket photo workflow and editing software tools aren’t for everyone.
For one, the subscription plans for better-known software are enough to turn many people away.
Putting aside cost, the Adobe suite of applications is intimidating, given its pro-level tools and workflows.
If you’ve used Capture One for years, moving to an equally complex workflow isn’t for the faint of heart.
That’s where Fuji X RAW Studio shines!
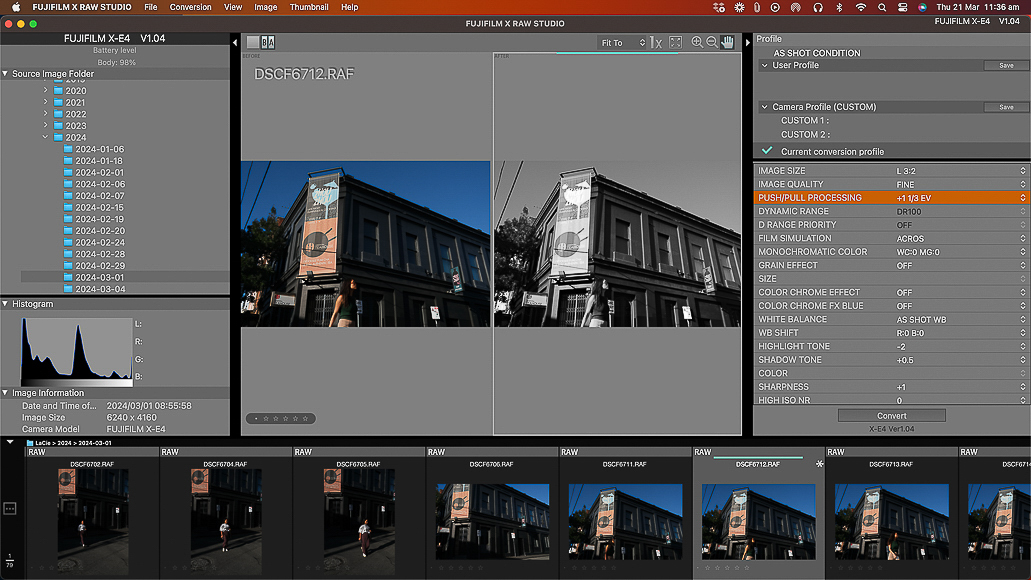
Fuji X RAW Studio is ideal for photographers wanting a no-fuss RAW editing solution.
Fuji X RAW Studio is an ideal photography image editing and workflow management tool for many reasons.
If you prefer to focus all your energy on taking photos and don’t want to invest time in editing, this software is for you.
Fuji X RAW offers photographers a straightforward and streamlined RAW image editing and conversion tool.
If you’re a Fujifilm photographer, you probably enjoy editing RAW files within the camera’s image editing and conversion menu.
It’s a brilliantly simple solution for editing images on the go while retaining Fujifilm cameras’ gorgeous image quality, film simulations, and colour science.
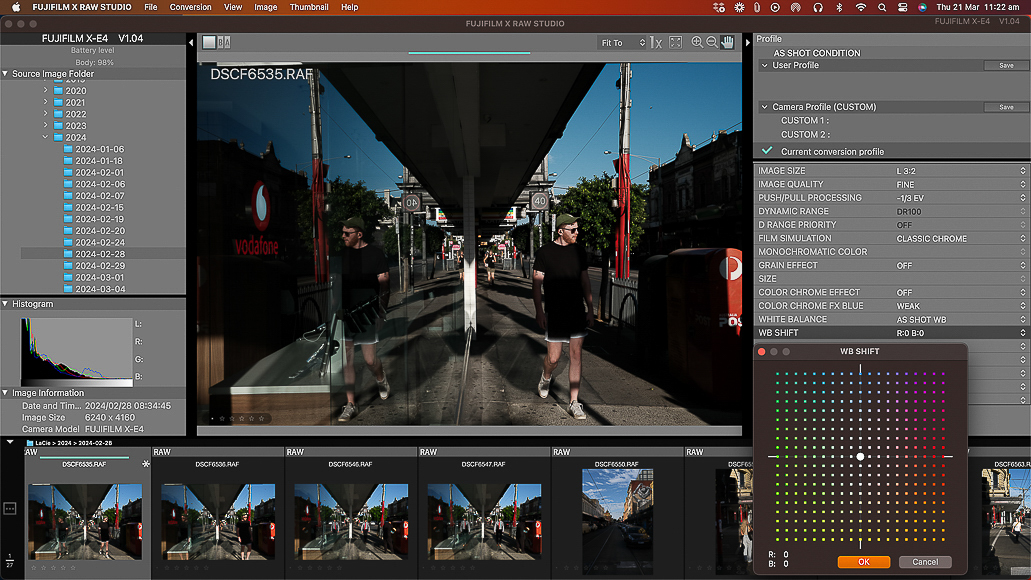
While Fuji X RAW Studio is basic, it features all the core image editing options.
Some Fujifilm photographers consider it a simple solution to create stunning Fuji JPEG images quickly.
Fujifilm shooters who like using the Fujifilm in-camera RAW Conversion and editing option must do so on a 3″ screen.
With Fuji X RAW, they can follow the same workflow on their computer, which has a much bigger screen.
Features of Fuji X RAW Studio
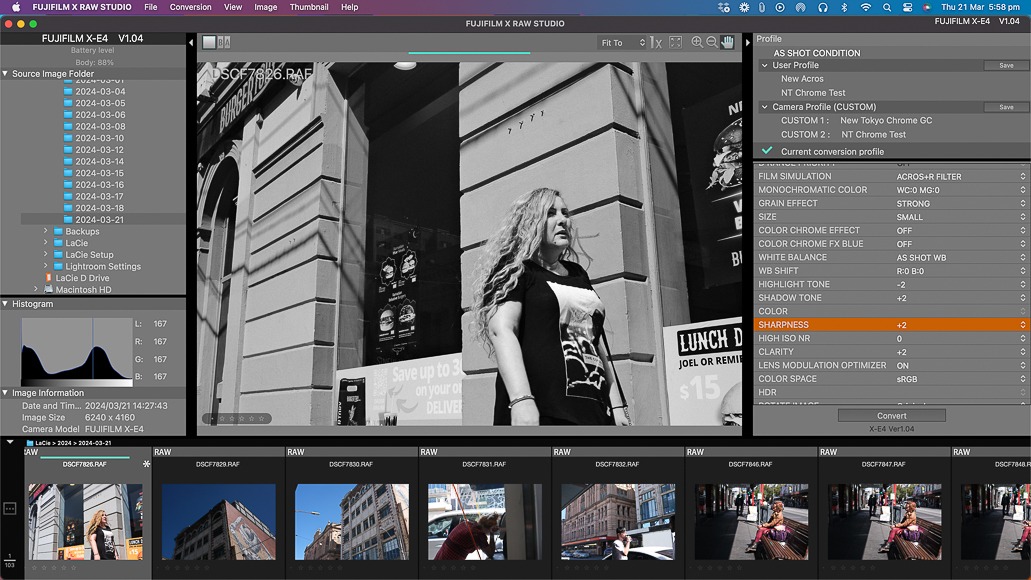
Fuji X RAW Studio features an easy-to-use interface.
Fuji X RAW is straightforward to understand and use.
To the left of the screen, you have the Source Image Folder menu, where you select the folder in which you’ve stored your Fujifilm RAW files.
Below that, a Histogram shows the selected image’s light, dark, and colour pixel density.
The horizontal carousel at the bottom of the screen previews all the RAW images within the folder.
These images can be sorted by Size, Name, and Timestamp.
You can also sort RAW Fujifilm files by a star rating assigned to each RAW file.
The right-hand side of Fuji X RAW Studio houses the Profiles and image adjustment tools.
With Fuji X RAW, you can create custom profiles that you apply to single or batches of RAW images.
The image adjustment tools mirror the adjustment options available within the Fujifilm camera RAW Conversion menu.
-
Apply Fujifilm Film Simulations

Fujifilm Film Simulations replicate the colour and appeal of Fujifilm film stock.
One of the best features of Fuji X RAW is the ability to apply Fujifilm Film Simulations to images.
Film Simulations are Fujifilm’s custom recipes that replicate their analog film stock from the past. Fujifilm is renowned for its colour science.
Applying a Film Simulation is like using an Instagram filter that alters the image’s colour palette.
Under the Current Conversion Profile, adjust image elements such as exposure, grain effect, shadow tone, highlight tone, and sharpness.
The very centre of the screen displays your selected image highlighted in the horizontal carousel.
-
Converting RAW Fuji Files To JPEG
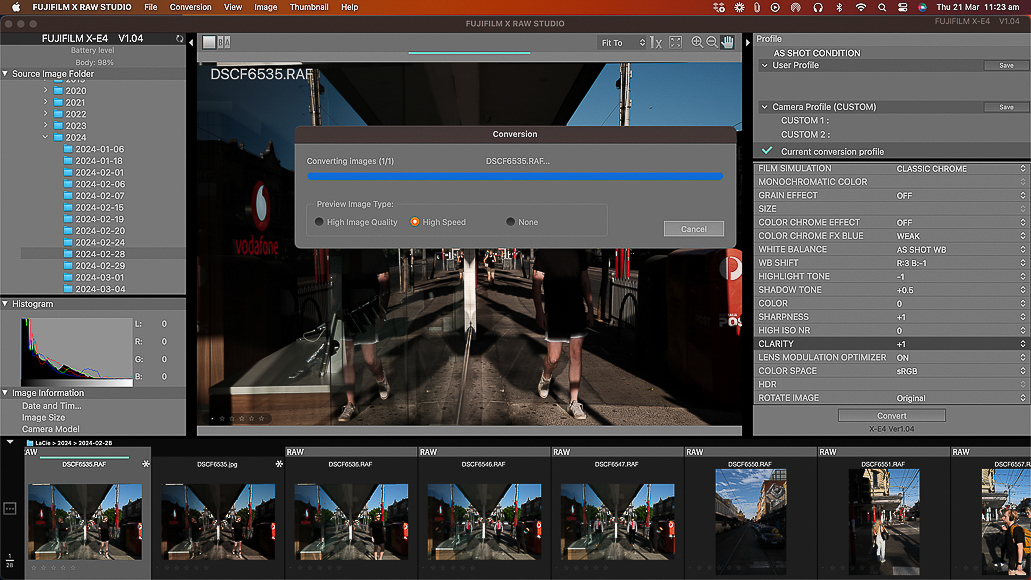
Fuji X RAW Studio enables you to convert RAW Fujifilm files to JPEG.
Once you’ve made the necessary adjustments to the RAW image file, it’s time to convert your selected image or batch of images to JPEG.
Pressing the Convert button under the image adjustment tools instantly converts the edited RAW file to a JPEG version.
The new JPEG file will appear in the same desktop folder from which the original RAW file came.
RAW files are much bigger and more data-dense than JPEG files.
As a result, JPEG versions of your images take up less storage, are more accessible to email, and upload to social media sites faster.
-
Creating Custom Film Simulation Recipes
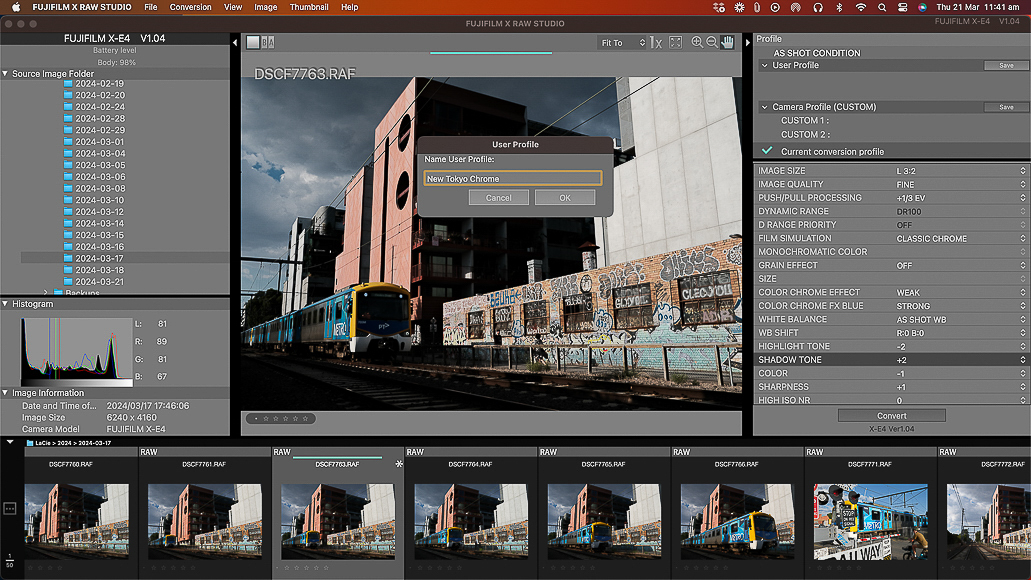
With Fuji X RAW Studio, you can create custom film simulations.
One of Fuji X RAW Studio’s most appealing features is creating and saving custom recipes as User Profiles.
When editing an image or batch of images, you apply a Fujifilm Film Simulation and adjust exposure, white balance, grain, and colour.
Under the Profiles box, you can hit the Save button and then name your User Profile.
Fuji X RAW Studio will save the profiles for future use with other RAW file conversions.
-
Adding Custom Profiles To Your Camera
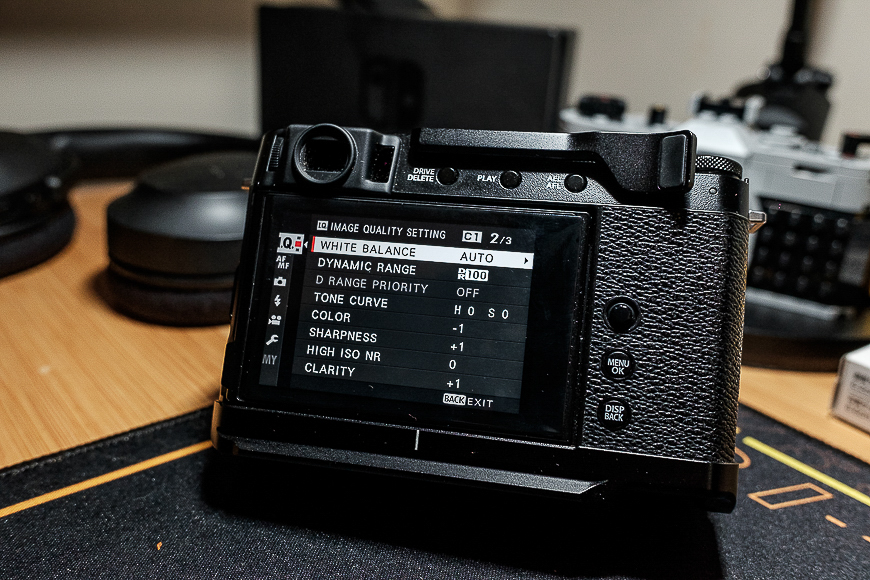
With Fuji X RAW, you can download custom film simulation recipes to your Fujifilm camera.
Imagine downloading the custom Fuji X RAW Studio profiles to your Fujifilm camera.
With Fuji X RAW, you can! Follow these steps:
- Ensure your Fujifilm camera is still connected to your computer and turned on.
- Once satisfied with your new custom profile in Fuji X RAW, click the Save button next to Camera Profile Custom.
- Next, select Copy User Profile To CAMERA CUSTOM SETTING.
- Choose a Custom slot and hit Save.
- Turn off and unplug your camera.
- In the Fujifilm camera IQ menu, select Custom Setting, and your custom profile will appear.
- Highlight it and hit OK.
Scrolling back through your IQ menu, you’ll notice that the image quality settings replicate the profile you created in Fuji X RAW Studio.

Shoot JPEG images with your custom Fujifilm film simulation recipes.
When shooting JPEG images with your Fujifilm camera, the custom profile will be applied to every JPEG image.
To turn off the custom profile, go to the IQ menu, select Custom Setting, highlight Nothing Selected, and hit OK.
Installing Fuji X RAW To Your PC Or Mac
Fuji X RAW Studio is a free and readily available download option provided by the good people at Fujifilm.
The Fujifilm X website in your region features a handy Support page providing digital access to Downloads, Manuals, Compatibility guides, FAQs, and Repair and Product Support.
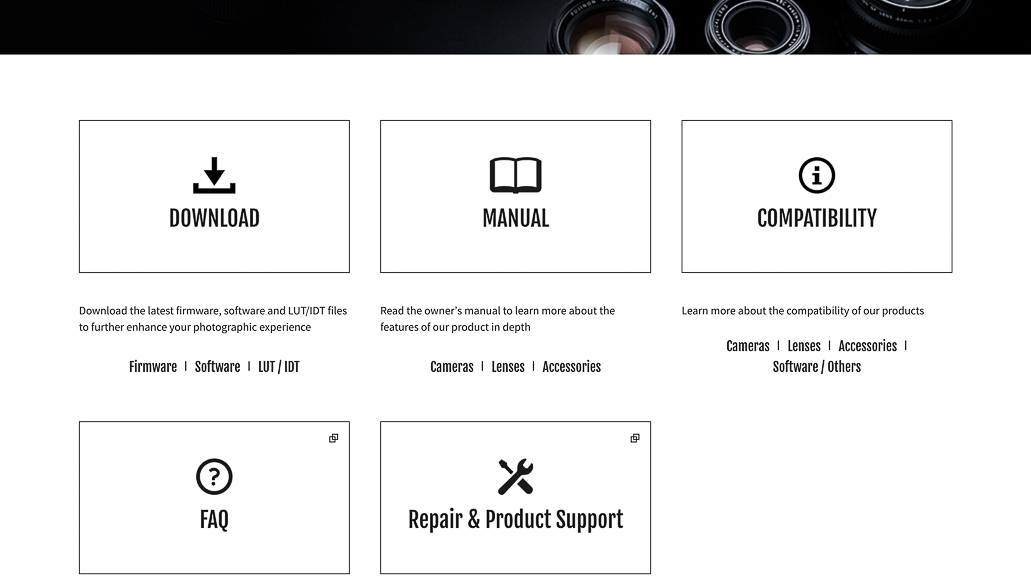
Fuji X RAW Studio is a free download that can be found on the Fujifilm website in your region.
Fuji X Raw Studio is under the Downloads > Software section and provides a user guide, compatibility chart, and the download option for Windows or Mac.
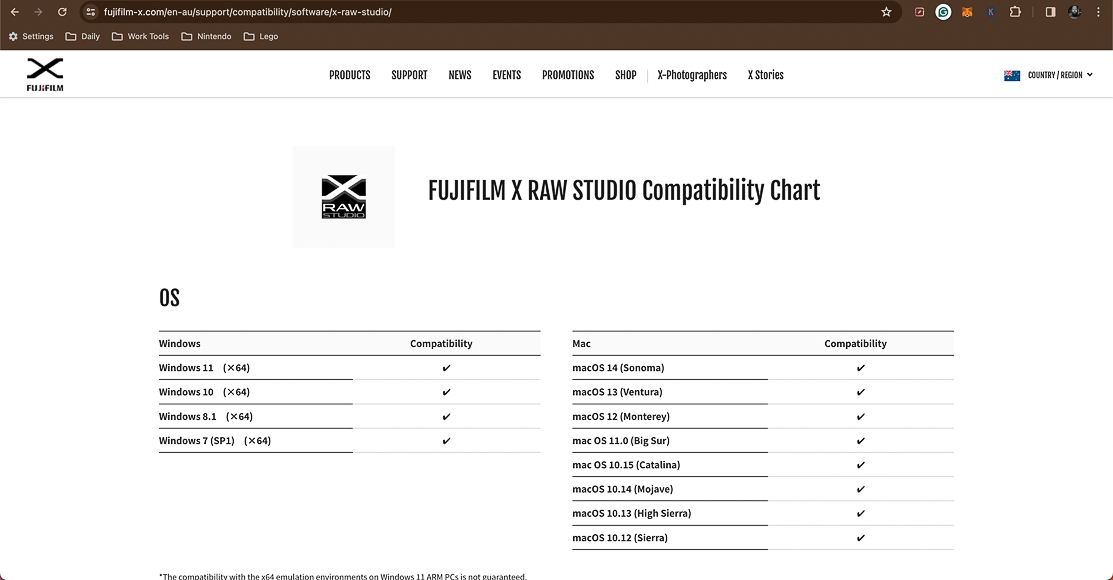
The Fuji X RAW Studio site also includes a compatibility chart for computer operating system requirements.
How To Use The Fujifilm X RAW Studio
It’s important to remember that the Fuji X RAW Studio only works with Fujifilm RAW files – it doesn’t recognise JPEG files (hence the name).
Here’s how to get set up with it. I’ve broken the process into smaller chunks to make things easier.
Downloading Fujifilm RAW Files To A Mac
Before using Fuji X RAW Studio on your Mac, you must download the Fujifilm RAW files from your camera or SD card.
Mac OS users have a couple of options. The first is to plug your camera into your Mac via a USB cable and download the files directly from the camera.
You’ll need to use the MacOS software Image Capture – it’s part of the OS and is included in all recent-generation Macs.

Use the MacOS Image Capture app to transfer RAW files from your camera to your Mac.
However, before you plug your camera into your Mac, you must prep the camera connection settings.
To do so, follow these quick steps:
- Press the Menu button on the Fujifilm camera.
- Scroll down to Set Up and select Connection Setting.
- Scroll down to Connection Mode and select USB Card Reader.
- The Fujifilm camera now operates as a very expensive SD card reader.
Image Capture will load previews of the RAW images as stored on the SD card, which is still within the Fujifilm camera.
The software allows you to select the RAW files you wish to download and where to place them.
Alternatively, you can remove the SD card from your Fujifilm X or GFX camera and plug it into the SD card reader on your MacBook or iMac, or plug it into a suitable SD card reader connected to your Mac.
Downloading Fujifilm RAW Files To A PC
The same process applies to PC desktop or laptop users.
To use Fuji X RAW Studio, you must first download the Fujifilm RAW files to the computer.
The best option for a PC is to follow the same process above to set the Fujifilm camera Connection Mode to the USB Card Reader.

The RAW file download process is much the same on a PC.
Once connected via a USB cable, the Fujifilm camera will appear on your PC within Devices and Drives.
Right-click on the camera and select Import Pictures and Videos.
You can also remove the SD card from the camera and plug it into an SD card reader.
Connecting Your Fujifilm Camera
Once you’ve downloaded your Fujifilm RAW files to your Windows PC or Mac, it’s time to set up your Fujifilm camera.
You must select the correct connection setting within the Fujifilm camera menu.
If you previously set the Fujifilm camera Connection mode to USB Card Reader, you’ll need to change it. Here’s how:
- Press the Menu button on the Fujifilm camera.
- Scroll down to Set Up and select Connection Setting.
- Scroll down to Connection Mode and select USB RAW Conv./ Backup Restore.
- The camera is now set to connect with your PC or Mac.

Download Fujifilm RAW files to your computer before using Fuji X RAW Studio.
Connect your Fujifilm camera to your computer with the appropriate USB cable. USB 2.0 is okay, but USB 3.0 cables will transfer data faster.
Turn the camera on. The rear screen won’t illuminate; however, the small LED indicator lamp will flash throughout the process.
With that done, it’s time to launch the Fuji X RAW Studio and create image magic!
Overall Performance
Fuji X RAW Studio is fast and has created no strain on my seven-year-old iMac.
Given that Fuji X RAW uses the Fujifilm camera X-Processor to do all the heavy lifting, very little is expected of your computer.
The in-camera RAW conversion software receives the RAW image data from Fuji X RAW Studio and returns the converted JPEG image data.
As a result, a new JPEG image is created and stored on your computer.
I noticed no lag in image adjustments, even when attempting to break the software with large batches.
When making the first download of a custom profile from X RAW to my Fujifilm camera, I thought the process failed.
It hadn’t – the process was so fast that I didn’t notice it had finished.
The software crashed on me only once, and it wasn’t due to heavy processing. It just quit.
How I Tested Fuji X RAW Studio
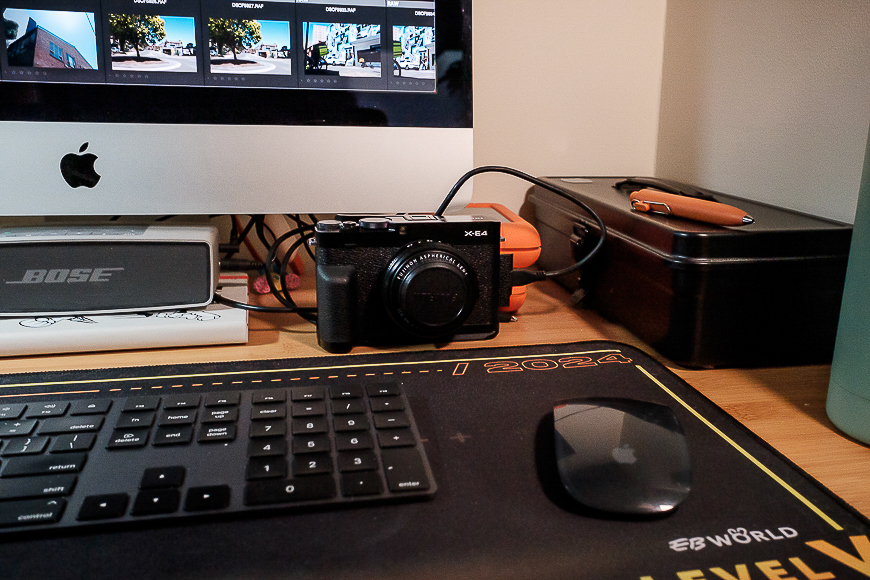
My Fujifilm X-E4 is connected to my iMac, which runs the Fuji X RAW Studio.
I downloaded and tested the Fuji X RAW Studio software on my 2017 27″ iMac. Here are the core specs:
- 3.4GHz Quad-Core Intel Core i5
- Radeon Pro 560 4GB Graphics Card
- 16GB 2400MHz DDR4 RAM
- MacOS Ventura
I used Fuji X RAW Studio to convert Fuji RAF (RAW) files from my Fujifilm X-E4 and Fujifilm X70 cameras.
While not the most extensive RAW Fujifilm files, especially compared to GFX RAW files, it effortlessly handled all process aspects.
Locating my RAW file folders, editing single images and batches, creating custom film simulations, transferring profiles to an X-Series camera, and the overall conversion process was a breeze.
Alternatives to Fuji X RAW Studio
Fuji X RAW Studio is an excellent RAW conversion tool designed by Fujifilm. However, it’s not the only kid on the block.
A long list of RAW editing and conversion software is available to Mac and Windows users.
RawTherapee is considered one of the best free RAW file editing tools available.
The software supports Mac, Windows, and Linux and offers RAW image management for compatible cameras.
Another great alternative to Fuji X RAW Studio is Darktable, also considered a perfect alternative to Adobe Lightroom.
Value
Fuji X RAW Studio is free software ideal for photographers on a budget or seeking a simple image editing solution.
It’s hard to beat a free piece of software developed by Fujifilm for use with Fujifilm X and GFX cameras.
Further, as part of their Kaizen business methodology, Fujifilm updates Fuji X RAW Studio to support camera and computer specification changes.
Fuji X RAW Studio FAQ
Why shoot RAW Fujifilm?
RAW files contain all the image data captured by the image sensor. As a result, the editing process of Fujifilm RAW files allows for greater flexibility in adjusting exposure, colour, and composition.
What does Fuji X RAW Studio do?
The Fuji X RAW Studio software for Mac and Windows converts Fujifilm RAW photos to JPEG format. The software utilises the in-camera FujifilM X-Processor to adjust core image elements, including exposure, shadow, grain, and colour.
Is Lightroom good for Fujifilm RAW?
Lightroom is an excellent pro-level solution for RAW conversion, image editing, and workflow management. I use Lightroom Classic as my primary software for editing my Fujifilm images.
Fuji X RAW Studio Review | Conclusion
Fuji X RAW Studio is a great RAW conversion software solution for Fujifilm photographers.
It doesn’t pretend to be anything other than a desktop version of the Fujifilm in-camera RAW conversion technology.
Fuji X RAW Studio is for you if you’re on a budget or looking to make the most of a streamlined image editing workflow.
I would love to see the next iteration include file data transfer directly from the Fujifilm camera into Fuji X RAW Studio.
Regardless, you’ve nothing to lose in downloading Fuji X RAW Studio and testing it yourself.
Have you ever used Fuji X RAW Studio for your Fujifilm RAW files? What RAW image editing software do you use and recommend?
Feel free to comment below and join the conversation.
Credit : Source Post


